VMWare ESXi 6.5 root Account Lockout

Account Lockout:
VMWare ESXi 6.0 and above include a new security feature to protect your from unwanted access and in some cases brute force attacks. In this article we will be using ESXi 6.5.
What is a brute force attack? A brute force attack is a method of trial-and-error (guess work) to obtain user information, typically a password. An attacker will use automated software to guess the password, normally for the root or administrator user accounts, on a continuous basis.
When an attacker attempts to brute force their way in or a user simply forgets the root password and triggers the account lockout the ESXi 6.5 system will disable the root account from being able to access the vSphere web client for 15 minutes by default. if the system is under a brute force attack it will have hundreds if not thousands of failed login attempts, due to this, the system may become inaccessible for an indefinite amount of time. The following steps will show you how to regain access to your hosts vSphere web client and how to either disable this feature (This is not recommended) or by pass it completely.
Recommended Action
::: {#here} First you will need to restart the management agents. The following steps will walk you through how to do this but you will need to be logged into the KVMoIP-IPMI. :::
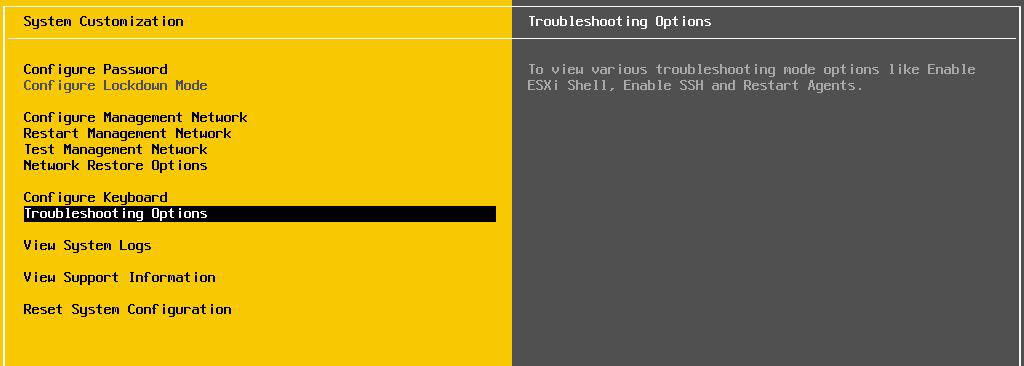
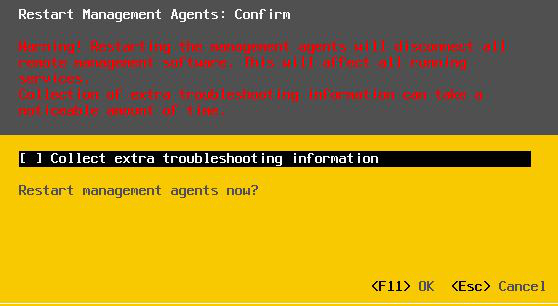
Login to your server Click on Troubleshooting Options → Restart Management Agents → Press F11 to restart agents, here you\'ll see that you also have an option to Collect extra troubleshooting information. Check the box if you\'d like.

Now that you have access to the vSphere web client we\'ll walk through the steps of creating a new user and new roles which new users can be added to. This will allow you to access the web client even if the root account is locked, the permissions this account has is entirely up to you.
Creating a new user is simple, click on Host → Manage → Security and users tab → click on users → then simply +Add user Creating permissions - permissions or Roles are used to provide certain users with a certain amount of access. Click on Host → Manage → Security and users tab → here you will click on Roles which is located right below Users → +Add role.
With the new user and role created, you\'ll need to add this new user to the new role. Click on Host → Actions this option will be located on the Host window where you\'ll find Hardware, Performance, and System Information → click on Permissions → Add user → choose the user you created → choose the role you created → click on add role at the bottom right of the window you are in.
Now you can login using the new user account you have created. Keep in mind however, the username you choose will need to be something an attacker is unaware of or else you risk a brute force on that user account, it\'s best to keep away from publicly available information as a username.
Disable Security.AccountLockFailures
If you are currently locked out of the system and do not have another user account you can access it with please refer here.
When you are logged into the root account go to Host → System tab → Advanced settings → in the top right copy and paste the following into the search bar Security.AccountLockFailures → Setting this to 0 will disable root lockout.
Additionally, Security.AccountUnlockTime will change how long that account stays locked. This setting is set to 15 minutes by default but you will see 900 seconds in the Value portion.
Support
If you find yourself unable to move forward due to a technical issue or just have questions regarding this process please open a support ticket. We are here 24/7/365 and we\'ll do our best to assist you.